I didn't think much about the cake while I was in Los Angeles over the summer, and I only had two weeks back in Seattle before the wedding. Week 1 consisted of a lot of recipe researching and testing. (Incidentally, I went to a book signing with Shauna Ahern, the Gluten-Free Girl, last spring and asked for tips on baking gluten-free cakes; she suggested a line of mixes called Pamela's. Might be okay for some, but I'm such a homemade purist that the thought of using a mix for a wedding cake disgusted me. I have this tendency to make things hard on myself like that.) I found a variety of recipes that looked okay, but I ended up using one from Kate of Gluten-Free Gobsmacked because it looked the most sensible. Some gluten-free recipes call for a billion different types of flour to balance out all the tastes and textures, while this one simply called for a GF flour blend (Bob's Red Mill makes a great one) plus almond meal. Simple.
My biggest problems during the recipe testing were the cake's moisture and structure. The recipe as written worked fine for a sheet cake, but there was no way that gooey carrot cake was going to stand up as two two-layered tiers. I decreased the number of egg yolks, ommitted a bit of liquid, added a bit of flour, and baked the cakes a bit longer. All my tinkering produced a cake that while still moist and dense was able to be layered and remain solid. (My final recipe is at the end of the post.)
Lisa and I agreed to try a "summer" and a "winter" version of carrot cake to see which she preferred for her September wedding. I made up a small cake of each along with its accompanying filling and frosting. On the left, the summer cake: flavored with ginger and lemon, crystallized ginger in the cake, lemon curd filling, and ginger-infused cream cheese frosting. On the right, the winter cake: flavored with warm spices, raisins and pecans in the cake, rum raisin filling, and vanilla bean cream cheese frosting.
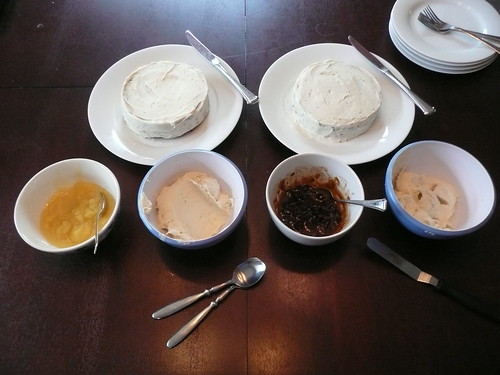

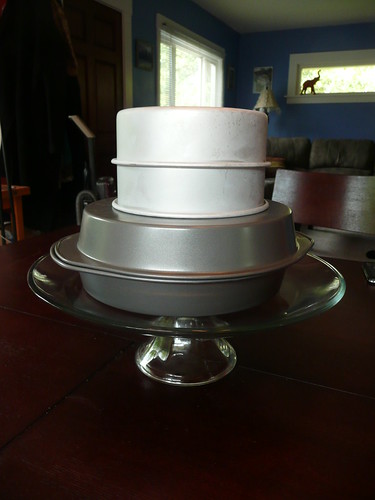
Both were delicious, but we decided that the warmer, deeper flavors were much too heavy for the season. Lisa also brought over the cake stand she bought for me, a beautiful and simple 12-inch clear glass pedestal. I stacked two 9-inch and two 6-inch cake pans to give a sense of what the finished cake would look like--pretty impressive!
Week 2 was a bit less crazy than the recipe-testing phase, but the stakes were much higher: I had no time to redo failed cakes. Luckily, nothing went horrendously wrong. I made a ton lemon curd, whipped up a batch of ginger cream cheese frosting, and baked all four cake layers without incident. I went to work for a few hours Friday morning, came home around lunch time, and went to work on the assembly.
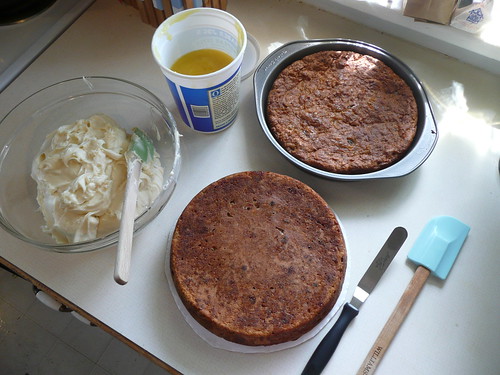
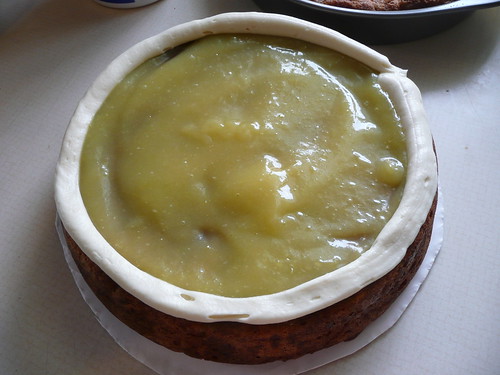
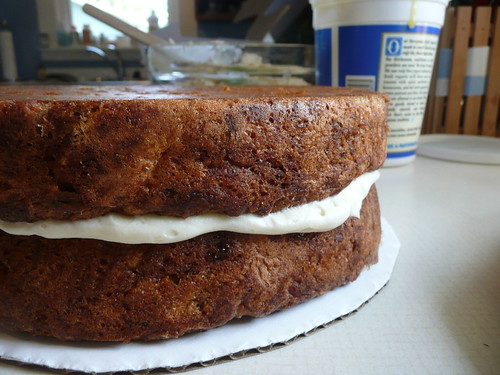
I cut cardboard cake boards to about 1/2 an inch larger than my cakes, using the cake pans as a guide. Then simply ran a knife around the edge of my 9-inch cake pan, put the cardboard circle on top, and flipped it all upside-down so the first layer plopped out onto the round. About 1/4 inch of cardboard was visible as a ring around the cake. I used a piping bag fitted with a coupler but no metal tip to draw a frosting "wall" around the border of the cake and filled the inside with lemon curd.
The second layer was flipped out onto my hand and set carefully on top. I was pretty happy with how flat the cakes baked, but feel free to cut off some of the top at this point if it's too domed.
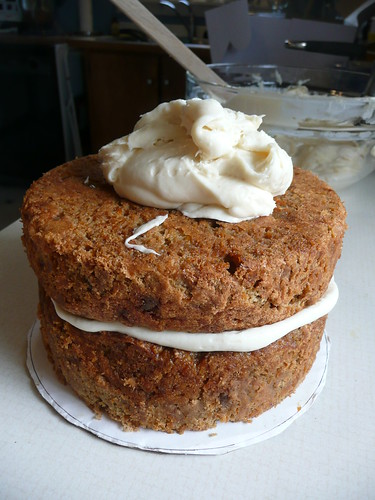
Once that was finished, the whole tier went into the freezer while I repeated the filling and layering with my 6-inch cakes. Then the fun part: shploop out a big spoonful of room-temperature frosting on top of the cold cake. It's amazing how much easier it is to work with chilled cakes but room-temperature frosting. Really makes a big difference.
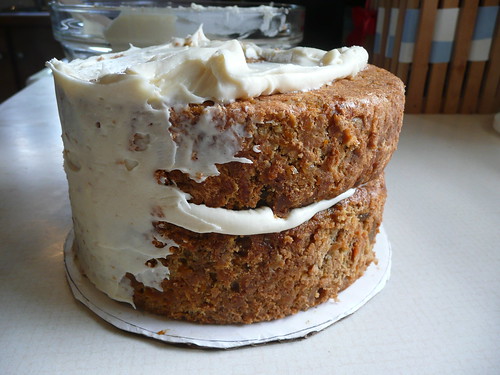
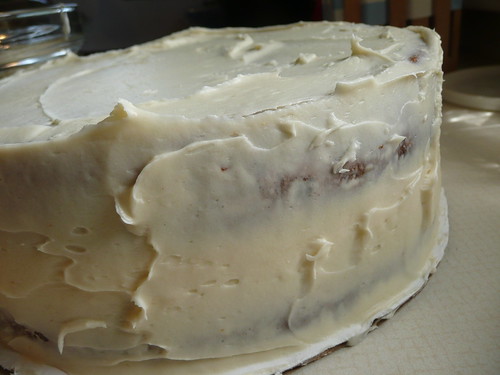
This is called a crumb coat; it's just a thin layer of frosting used to trap crumbs and create a smooth surface. I concentrated at this point on filling in the cracks on the sides; the bits of carrot had left them a bit uneven.
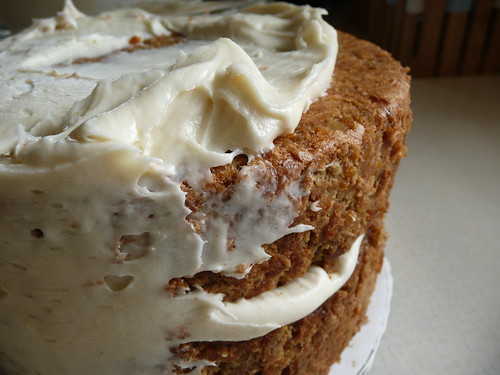
See how the crumbs are trapped in the frosting? That's perfect. Now when we chill and frost the cakes again, these crumbs won't show up on the outside of the pretty second layer of frosting.

Both tiers went back into the freezer to harden while I ran around like a chicken with its head cut off. The wedding was at 5:30, a two hour drive away. It was already 2:30, and Torian had just called to say that if I didn't get on the road soon I'd hit rush hour and not make it on time. That kicked my butt into gear. I abandoned plans for a shower, threw a dress and heels in the back of my car, and quickly packed up my frosting/piping bag/offset spatula/emergency white sprinkles and sanding sugar.

I bought these cake boxes (as well as many of my other kitchen supplies) at a fantastic store near me called Mrs. Cook's. I didn't even realize until I assembled them that they have a notch to hold the lids semi-open. How smart!

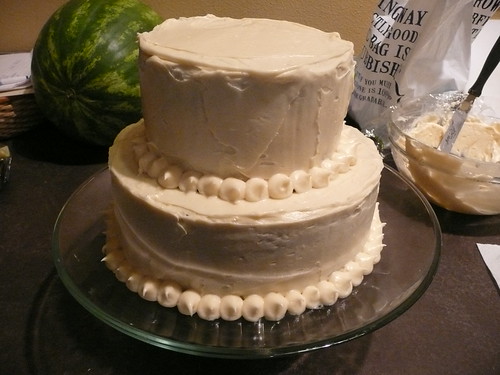
So the cakes got boxed up, not nearly as frozen as I'd hoping they'd be, and spent a two-hour drive slowly thawing. Great. I arrived around 5:00 with just enough time to finish the last steps. Luckily there wasn't any irreparable damage from traveling, just a little frosting smushed off on one edge. I unpacked my things in the small prep kitchen and quickly iced each cake tier with a a second layer of frosting. As you can see, I didn't worry too much about getting the frosting perfectly smooth. Mainly because it's near impossible (99% of smooth cakes are covered in fondant, a cake decorator's sneaky sugarpaste secret), but also because I liked the bit of texture and visual interest.

I centered the bottom tier on the cake plate and then carefully set the smaller tier on top. Rotated the cake plate to check that everything was centered--the cakes shouldn't appear to move side-to-side as you do this, or that means they're not in the perfect middle of your platter. I finished the edges where the cardboard circles were visible by piping cute fat little dots of icing and quickly drawing back the pastry bag to make a point on each. I'd seen this on a few of the cakes I looked at for inspiration, and I was really happy with how it turned out.
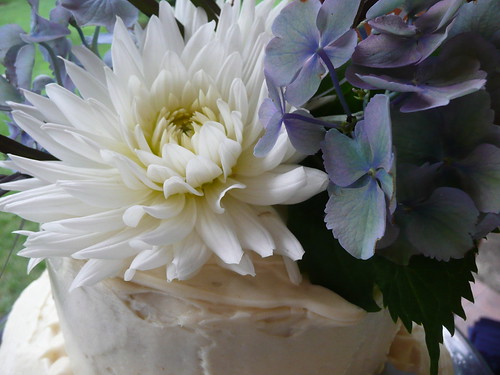
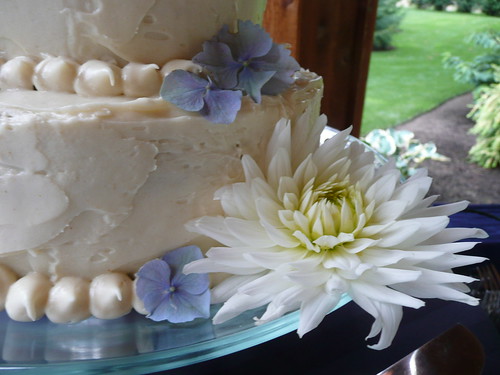
Torian's mother, who was acting as wedding coordinator and grand poo-bah of the entire event, had supplied me with a bunch of extra flowers from making the bouquets. The whole wedding was decorated with blue hydrangeas, white dahlias, and cool spiky greenery. Lisa and I had talked about arranging flowers on top of the cake, but it still seemed to be missing something. I set one large dahlia on the cake plate itself, with a few little hydrangea blossoms scattered to tie it together. Perfect.
Are you ready for the money shot?
Are you sure?
Because I have to say I'm damned proud of this photo.
Ta da!

(You should all be chiming in in unison: "Oooooooh." Thank you, thank you.)
The cake was the centerpiece of the whole dessert spread. Lisa had invited her friends and family to bake something (not gluten-free) to contribute to the cookie/bar table, and the caterers did a great job of arranging and labeling all of the contributions. My cake got the prime spot, though. I was pretty pleased.

Lisa and Brandon were adorable. He had no idea there was going to be a gluten-free cake; she had kept it a total secret the whole time. Silly boy. A gluten-free bride has got to eat some sort of dessert on her wedding day! Carrot cake is his favorite, and he was so surprised.
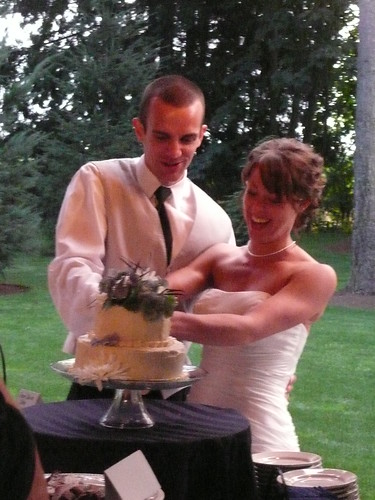
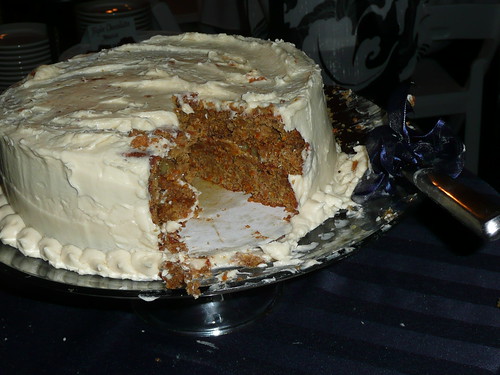
I had forgotten to mention to Lisa that there was going to be a cardboard circle between the layers--I sincerely didn't think they'd try to cut through both layers at once! They hacked at it for a minute, laughing the whole time, until they finally got a piece out.


I stood at the cake, cutting slices for guests as the line filed by. It was a lot of fun talking to the guests, explaining how the cake was gluten-free and why. Most people chose to take a piece. It was a little iffy lifting the smaller cardboard circle from the top of the larger tier, but I just scraped off the stuck icing and re-spread it on top. I'm sure there's a better way to stack layers without cardboard and I showed my total noobie wedding cake status by not doing it "right." But hey, it worked.
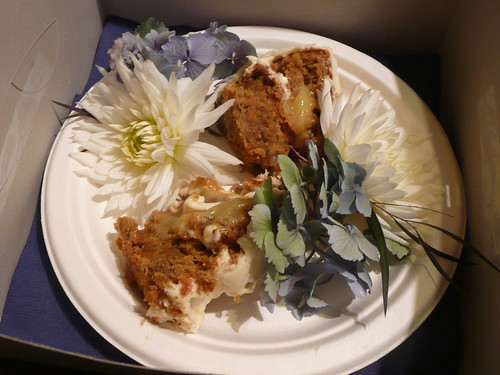
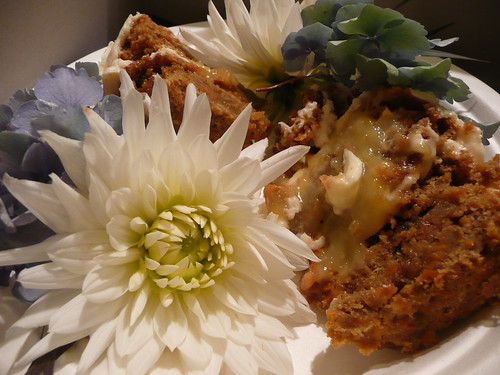
I saved the last two slices for the bride and groom to take with them on their honeymoon. Packed them up in the smaller cake box with some of the flowers--a lovely little gift to wish them off onto their married life.
Gluten-Free Ginger-Lemon Carrot Cake for Lisa’s Wedding
Liberally adapted from Gluten-Free Gobsmacked
4 C grated carrot (2-3 large carrots)
¾ C butter
1 C brown sugar
3 egg whites and 1 yolk, separated
1 tsp. lemon zest
½ tsp. vanilla extract
½ C almond flour
¾ tsp. xanthan gum (a binder used to add structure to gluten-free baked goods)
¾ tsp. baking powder
¼ tsp. baking soda
¼ tsp. salt
1 tsp. cinnamon
1 tsp. nutmeg
½ tsp. ground cloves
2/3 C crystallized ginger pieces
Preheat oven to 350 degrees. Grate carrots (a food processor with a grating blade makes this easy), spread out on a dish towel, roll up, and press to remove all excess liquid. Unroll and let grated carrots air-dry.
In a stand mixer or a large bowl, cream together butter and brown sugar until fluffy. Add egg yolk, lemon zest, and vanilla, beat until fluffy again.
In a separate bowl, mix together gluten-free flour, almond flour, xanthan gum, baking powder, baking soda, salt, and spices. Add to creamed butter/sugar mixture, mix until blended. Add carrots and ginger, mix until blended.
If you’re using a stand mixer, remove the batter to a different bowl—your dry ingredients bowl is a good choice—and wash out the mixer bowl. If you’ve been mixing by hand, you’ll want a new bowl and either an electric hand-mixer or a really strong arm for this step. Whisk egg whites until stiff peaks are formed and gently fold into batter.
Butter a your cake pan: an 8” or 9” round or square pan works well, as do two 6” rounds. Pour batter into pan and bake 40-50 minutes until the top is a deep golden color. (30-40 minutes for 6” cakes.) You’ll want to bake it about ten minutes after a toothpick comes out clean; this helps the cake dry out and not be so gooey in the center. Cool in pan 10 minutes before flipping onto a cake stand or plate. Freeze briefly or refrigerate until cold before frosting
.
Ginger-Lemon Cream Cheese Frosting
1 T crystallized ginger pieces or 1 tsp. dried ginger powder
1 tsp. lemon extract
½ C butter, softened
8 oz. cream cheese, softened
1 lb. powdered sugar
In a food processor or with a mortar and pestle, crush ginger and lemon extract until a smooth paste is formed. In a large bowl, whip together butter and cream cheese. Add ginger-lemon paste and mix. Slowly add powdered sugar, mixing between additions, until frosting is thick and spreadable.
Lemon Curd
3/4 C lemon juice, strained well
1 T grated lemon peel
1/4 C butter, cut into pieces
1 1/4 C granulated sugar
4 eggs, lightly beaten
Grate the lemon zest before you cut the lemons open to juice them.
In a saucepan, combine lemon juice, lemon peel, butter, and sugar over medium heat, stirring until butter has melted. Add beaten eggs to lemon mixture, stirring constantly with a wooden spoon. Continue to stir over medium heat until mixture is quite thick--it should coat the back of the spoon. Be careful not to overcook or it will separate. Remove from heat and strain mixture by gently stirring it through a sieve into a bowl or pitcher (if you stir it too vigorously you will force little icky bits of egg into the finished product). Pour into glass jars or tupperware; the curd will thicken as it cools. Set in fridge until cool, keep refrigerated until used.
Makes about 3 cups and keeps up to 3 months.
What's that? You want to see the pretty picture one more time? Oh, okay. Only because I'm nice.
And because it's one of my favorite photos I've ever taken.
I have to admit, this is pretty amazing. It's better looking than anything on those cake reality shows, and you did it without a professional staff, thousands of dollars worth of appliances and ingredients, and on your own time. You should definitely be proud of yourself!
ReplyDeleteOoooooooh! Very preetee! Me proud of daughter!
ReplyDeletestunning =)
ReplyDeleteoh wow it's fantastic, I did the same thing as you. the wedding is in 2013 your blog is super I will copy your cake if you don't mind
ReplyDeletethanks very much
I have done the same stupid thing: volunteered to both cater and bake the cake for a friend's wedding next week. This looks like a perfect cake for her gluten-free wedding, but may I ask if you doubled the batch for your cake? 1.5 cups of "flours" seems like a small amount for the double-decker awesomeness you've shown us here. Thanks!
ReplyDelete